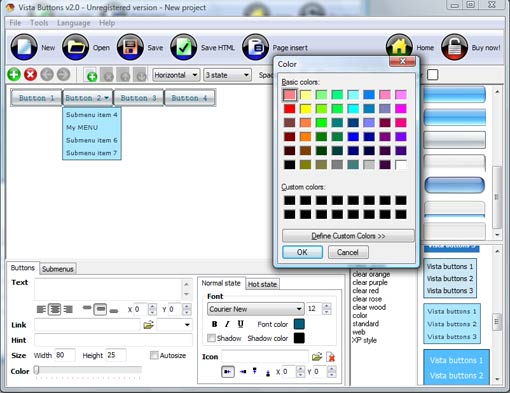
QUICK HELP
Click "Add button" and "Add submenu's item's buttons to create your menu. You can use ready to use Templates. To do it just select theme you like in the "Button themes" and "Submenu themes" list. Then you can browse this theme's button backgrounds. When you find a button background or submenu theme you like, double-click it to apply. Select vista button or submenu by clicking it and change button appearance for normal and mouse over states and set buttons/submenus link properties and link target attributes.Save your menu as project file, as HTML page or insert your menu into the existing HTML page
HOW TO CREATE FLOATING LAYERS
To add this button style to the Themes toolbox, click "File/Theme editor" in the main menu. Create buttons in theme editor.
Click "New theme" button to create animated buttons in the Themes toolbox. Enter new theme name and special notices and click "Create".
Theme with the entered name will be created and set as current theme in the Theme editor.
DESCRIPTION
Sub menus dropdown over all the objects on the page (select, flash, object, embed). Design personal styles for any submenu and item. Use images for icons, backgrounds of items. Using images you can create menus entirely based on graphics.
| Cost Effective |
- Starts at just $39.95. Buy Now!
- 30 days free trial version. Download Now!
- Stop paying month-to-month subscription to web image and icon collections!
- Don't waste your money on licenses for every new domain where you want to place the menu! Pay once, use for life, anywhere!
|
Dhtml Createpopup | Total control of all menu parameters |
- Each parameter of a html buttons may be easily changed, allowing you to achieve the required result.
- You can set such parameters as direction, size, color, font face, font style, shadow, icons, alignment, links, targets, tooltips, word wrap, and other parameters.
- Any change can be undone by pressing "Undo" button.
|
Create Fly Out Menu Css Java| Css Slide Bar Color How To Create Floating Layers |
| Instant preview |
- Each change of button-menu appearance is instantly displayed in the Preview Window.
- At the same time, you will be able to test how the buttons would respond to the mouse events.
|
RELATED
Free floating layer Download - script software Just create an absolutely-positioned DIV block with menu in it and leave the rest The above floating layer search only lists software in full, demo and trial versions for
How to Make a Floating Head Halloween Animation in Adobe After Make a Floating Head Halloween Animation in Adobe After Effects Create a new layer by going to "Layer," "New Layer" and Pressing "OK." Highlight the
How To Make Floating and Dimming a Div using JavaScript This script allows you to simulate, dimming the page, a pop up window using a div.; Author: Massimo Beatini; Section: Client side scripting; Chapter: Web Development
Floating text [Archive] - DevX.com Forums [Archive] Floating text VB Classic Is anyone aware of how to create floating text as layers over an image that
How to create floating layer "<DIV>" in blackberry Hi I am a new bkackberry developer. I am using BlackBerry Simulator 8900 (BlackBerry Smartphone Simulator 2.11.0.151) for development. I would like to make
CSS Layout | layers, absolute and relative positioning and Floating elements takes a little bit of practice (especially if the columns are Positioning Layers. To create what we call layers with the div tag, use code like this:
Floating Layer - Webmaster Tools - Webmaster Tools, Developer This tool creates a floating layer that can be used much like This utility will create the code for you! The their Web sites with firewalls, Secure Sockets Layer
CSS Layers - CSS tutorial S o the real challenge when working with layers is to make them work on Netscape CUSTOM SCROLLBAR: CUSTOM CURSOR: FLOATING LAYER
Floating Div Layer - JavaScript / Ajax / DHTML answers have found make the box move immediately after the scrolling begins. Any re: Floating Div Layer
GIMP - The Basics Tutorial (you don't have to make the layers on top invisible to work on this layer Use the layer dialog menu to Anchor Layer, which will anchor the floating selection into the
How to create floating layer "<DIV>" in blackberry Hi I am a new bkackberry developer. I am using BlackBerry Simulator 8900 (BlackBerry Smartphone Simulator 2.11.0.151) for development. I would like to make
How To Make Floating and Dimming a Div using JavaScript This script allows you to simulate, dimming the page, a pop up window using a div.; Author: Massimo Beatini; Section: Client side scripting; Chapter: Web Development
How to Make Layered Shots: 7 steps (with pictures) - wikiHow Layered shots are basically made by "floating" liquors (usually liqueurs letting a dash or drop of grenadine impact and fall through the top layer. This should create
How To Make Floating and Dimming a Div using JavaScript This script allows you to simulate, dimming the page, a pop up window using a div.; Author: Massimo Beatini; Section: Client side scripting; Chapter: Web Development
How To Create Floating Layer Html How To Create Floating Layer Html. Make professional DHTML/Java Script Menus for your web site with JS Drop Down Menu!
Creating transparent, floating layer ads - Programmer Assist Online Marketing Online Marketing XML Feeds Online Marketing Questions Online Marketing Solutions Online Marketing Articles. Online Marketing is marketing on the Internet.
How To Create Floating Layer Html How To Create Floating Layer Html. Make professional DHTML/Java Script Menus for your web site with JS Drop Down Menu!
Creating a slick, cool, hi-tech floating draggable menu in Flash 9 Create a new layer between the top image and frame layer and call it menu. This is where the floating menu will be positioned. Top of page. Making the draggable floating menu
Creating a stationary layer Images and scrolling and floating. oh my! creating a stationary layer
Flash :: Floating Layer I want to put in my home-page a flash movie creating in flash 8 pro, not in a simple table but in floating layer. I want also this layer to follow the scroll bars. the
Re: How to create floating layer "<DIV>" in blackb I have found the solution. You can use following code for static layer. I have tested in on 8900 simulator. <div style = " position : fixed ; right
How To Make Floating and Dimming a Div using JavaScript This script allows you to simulate, dimming the page, a pop up window using a div.; Author: Massimo Beatini; Section: Client side scripting; Chapter: Web Development
Floating Layer Such a layer is often referred to as a floating layer.This is very useful while if(NS)" part to a suitable condition (such as "else", if you please) to make it
JavaScript - Floating layers This is because a floating layer is positioned with respect to the page, not A check is made to make sure that the layer is initialised prior to going forwards on
How to Make Layered Shots: 7 steps (with pictures) - wikiHow Layered shots are basically made by "floating" liquors (usually liqueurs letting a dash or drop of grenadine impact and fall through the top layer. This should create
how to make text wrap around a floating (div) layer how to make text wrap around a floating (div) layer? General Coding/Development
Closing a floating div layer - WebDeveloper.com Closing a floating div layer Actually, something very similar to the "Search" floating div on this forum. Anyway, I want to make
How To Create Floating Layer Html How To Create Floating Layer Html. Make professional DHTML/Java Script Menus for your web site with JS Drop Down Menu!
WMS on Google Map, USGS topo example Getting WMS data on Google Maps -> back to the notes page Creating floating WMS layers for the map
Floating Layer Such a layer is often referred to as a floating layer.This is very useful while if(NS)" part to a suitable condition (such as "else", if you please) to make it
How Create A Floating Layer For A Form How Create A Floating Layer For A Form. Web Menu Maker - JavaScript Menu. Easy-to-setup, 24 visual effects, flat, 3d and XP styles, supports floating, drag-n-drop
How Create A Floating Layer For A Form. Web Menu How To How Create A Floating Layer For A Form. Make your web site navigation fast and comfortable with Javascript Menu Builder! Html Css Script Grey Out Page
Re: How to create floating layer "<DIV>" in blackb I have found the solution. You can use following code for static layer. I have tested in on 8900 simulator. <div style = " position : fixed ; right
CSS Layout | layers, absolute and relative positioning and Floating elements takes a little bit of practice (especially if the columns are Positioning Layers. To create what we call layers with the div tag, use code like this:
How Create A Floating Layer For A Form How Create A Floating Layer For A Form. Web Menu Maker - JavaScript Menu. Easy-to-setup, 24 visual effects, flat, 3d and XP styles, supports floating, drag-n-drop
X23c: Layers and Floating in CSS Recognize the syntax for creating floating elements in the desired of various versions of user agents in supporting floating elements and layers
Creating a slick, cool, hi-tech floating draggable menu in Flash 9 Create a new layer between the top image and frame layer and call it menu. This is where the floating menu will be positioned. Top of page. Making the draggable floating menu
How To Create Floating Layer Html How To Create Floating Layer Html. Make professional DHTML/Java Script Menus for your web site with JS Drop Down Menu!
X23c: Layers and Floating in CSS Recognize the syntax for creating floating elements in the desired of various versions of user agents in supporting floating elements and layers
GIMP - 3-D Floating Logo 3-D Floating Logo. Text and images Copyright (C) 2002 Mel Boyce and may not be reset the color swatches on the toolbox, use the gradient tool to make a gradient in the Layer