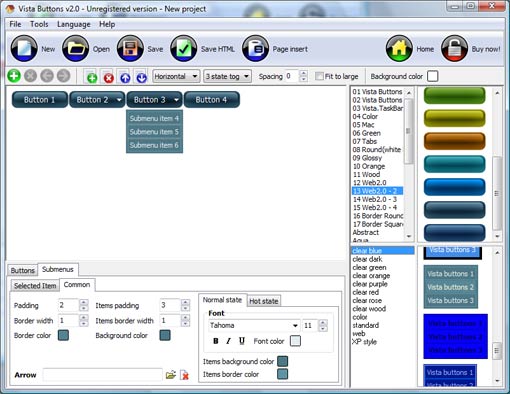
Create your menu using "Add button" and "Add submenu's item's buttons.
Use various ready to use Templates. Double click on the Template to apply it.
Change button appearance for normal and mouse over states and set buttons/submenus link properties and link target attributes.
Save your menu as project file, as HTML page or insert your menu into the existing HTML page
CREATE DYNAMIC TREE USING
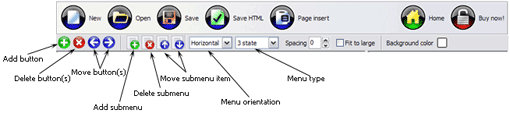
Button builder toolbar
New - to create new project.
Open - to open existing project.
Save - to save current project into the project file (*.xwb).
Save as� - to save current project into the project file (*.xwb) or into the HTML file or to save your project under another name. Choose type from the "File type" list in the "Save as�" dialog.
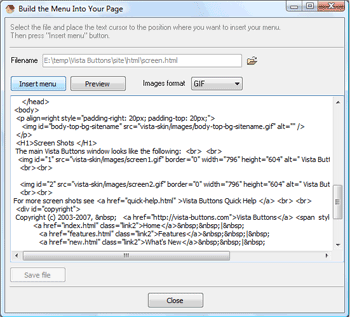
Page insert - to insert your menu into the existing web-page. "Build the menu into your page" dialog will appear. Click "Browse" button to choose a page you want to insert your menu into. After choosing a page and clicking Ok, the chosen page's HTML code will be opened in the Code field of the dialog.
After that, you can edit your code to prepare the page for the menu insertion. Normally, no coding is required. Then set the cursor to the line you want menu code to be inserted to and click the "Insert" button. The menu code will be inserted into the page. Then you can either save the page or close the dialog without saving by clicking "Save" or "Close" buttons.
Add button - to add website buttons to the menu.
Delete button(s) - to delete selected button(s). Is inactive if no button is selected. Move button(s) - to change selected button's order in the menu. Selected button(s) will be moved one position left/right each time you click one of the Move buttons.
Add submenu's item - to add submenu's item to the menu. Is inactive if no button is selected.
Delete button(s) - to delete selected submenu item(s). Is inactive if no button is selected.
Move submenu's item - to change selected submenu's item order in the menu. Selected item(s) will be moved one position up/down each time you click one of the submenu's item.
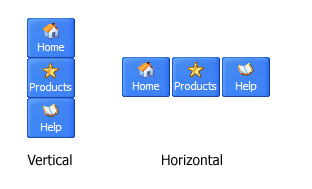
Menu orientation - to select menu orientation (vertical or horizontal). In vertical menu all website buttons are arranged in a column and have the same width. If the menu is horizontal then all its buttons are arranged in a row and have the same height.
Menu type - to select menu type (1-state, 2-state, 3-state and 3-state toggle).
1-state buttons are simple static image buttons. Example:
2-state buttons respond to mouseOver event creating rollover effect. Mouse click doesn't change the button appearance. Example:
3-state buttons support both mouseOver and mouseClick event. Example:
3-state toggle buttons additionally stick in the pressed state after a click. Example:
Spacing - to add space between all buttons.
Fit to large - to make all the menu buttons have the same size. The size will be automatically set to accommodate the biggest text and/or icon in the menu.
Background color - click the square to select Work area's background color.
DESCRIPTION
Apply any font of any color, size and font decoration you need. Use any available type, color and thickness of a menu's frame. Choose any color for submenus and items backgrounds.
Specify various values for spacing and padding for the whole menu and for each separate submenu.
Create separators using your own pictures, size and alignment.
High Quality and Professional Results
You don�t have to know HTML, JavaScript, CSS or any other coding languages to make multi-state rollover web buttons, professional cross-browser, search engine friendly DHTML menus.
Vista Web Buttons will generate all necessary images, html, javascripts, css styles automatically!
Beispiel Javascript Tree
3-state rollover buttons
JavaScript DropDown Menu automatically generates images of buttons for normal, mouseover, and click states.
There is also a feature of creation either static or 2-state buttons.
Coole Html Codes Für Page
Anim Collapse Vertical Menu Create Dynamic Tree Using
Extended capabilities to save and export the results
Everything you create with the program, has been saved in the Project File. This allows you either to continue your work at any time, or share your ideas with friends and colleagues.
You can also save your menu as a HTML page, or export it as separate graphic images.
RELATED
CreatingDynamic ASP.NET Server Controls Using XML CreatingDynamic ASP.NET Server Controls Using XML (Page 1 of 5 ) A common way of using XML in ASP websites is to format dynamic information. In this article Eric shows us
Creating A DynamicTree in JavaScript Creating A DynamicTree in JavaScript to be populated or read an XML file to generate the tree. I've tried to develop one using the
Ajax Tree You can do this by creating a script such as the following: Listing x. Dynamic Dojo Tree<script type="text An Example of using a tree context menu would be: <div
CreatingDynamicTree component in RCFaces This example will illustrate you that how you can create a dynamictree Print Screen Using Java Swing; How to Create Button on Frame; Application Architecture
Creating A DynamicTree in JavaScript Creating A DynamicTree in JavaScript to be populated or read an XML file to generate the tree. I've tried to develop one using the
Treeview JavaScript tree menu Server-side, dynamiccreation of folders and links (optional) If you would like your server to automatically create a tree of a static tree and it will be built by using
Treeview JavaScript tree menu Server-side, dynamiccreation of folders and links (optional) If you would like your server to automatically create a tree of a static tree and it will be built by using
CreatingTree Structure using GWT Dynamic memory allocation is done by using malloc : Java Trees, Java JTree Example, CreateTree in Java, Creating a JTree Component Java JTree Examples,Java Tree Component