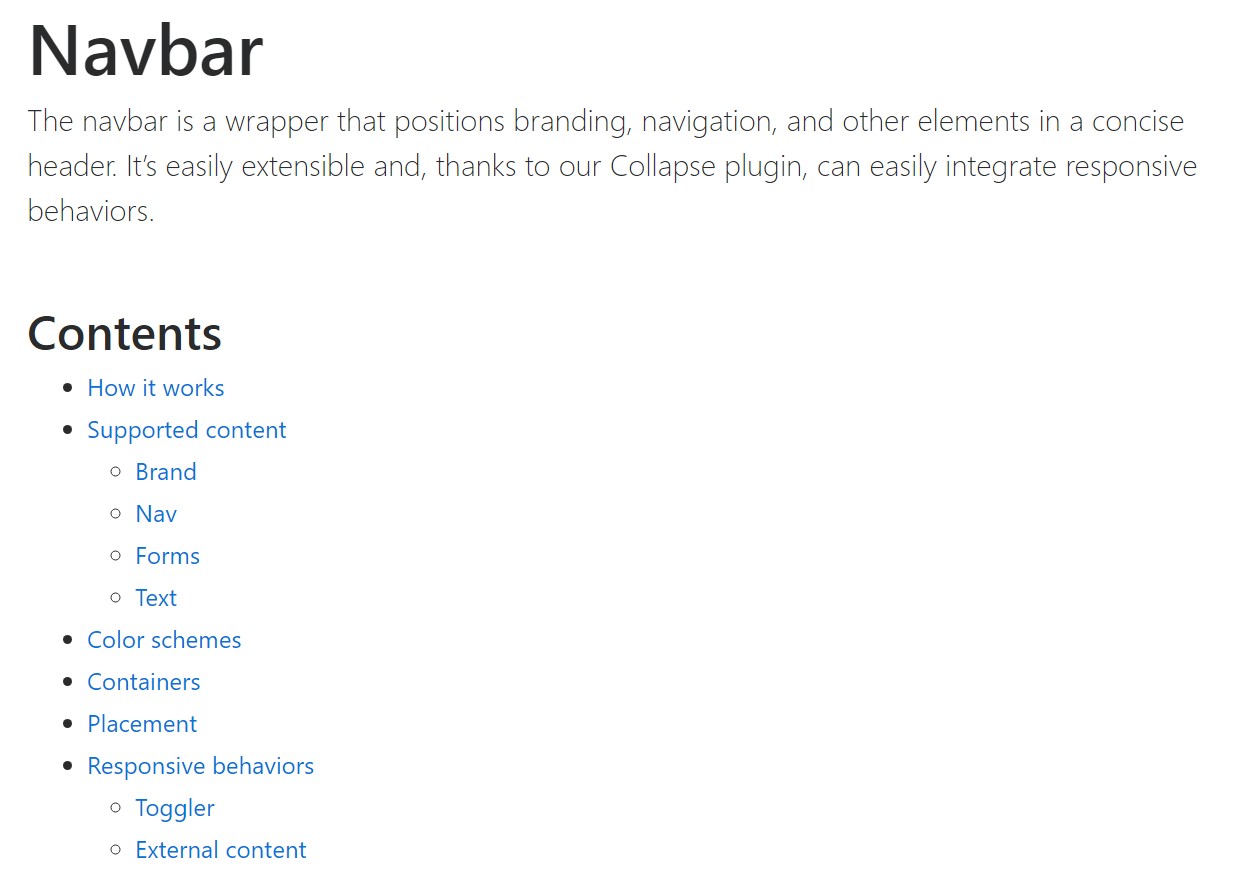
Bootstrap Navbar Active
Intro
No matter how complicated and elaborate web site organization we create, it doesn't mean a great deal if our people do not provide the end user a convenient and also user friendly way accessing it and getting to the exact web page required quickly and with the very least time and efforts despite of the display size of the device presenting the site. With Bootstrap 4 it's certainly easy to include a flexible Bootstrap Navbar Dropdown wrapping the menu organization easy and fast with minimal code. The navbar can be set up to collapse under a particular screen width and a display horizontal above it appears and user experience when it comes to adaptive behavior. Here is how: Listed here is just how:
The way to work with the Bootstrap Navbar Content:
Here's things that you require to find out right before beginning with the navbar:
- Navbars need a wrapping
.navbar.navbar-toggleable-*- Navbars and their components are really fluid by default. Employ optional containers to control their horizontal width.
- Navbars as well as their elements are constructed using flexbox, delivering convenient arrangement options through utility classes.
- Navbars are certainly responsive by default, though you can simply customize all of them to modify that. Responsive activity baseds on Collapse JavaScript plugin.
- Provide availableness utilizing a
<nav><div>role="navigation"First we require a
<nav>. navbar.navbar-fixed-top.navbar-fixed-bottom.navbar-dark, .navbar-light.bg-info, .bg-successdesign =" background-color: ~ your shade ~"bg-*<nav>If you want the navbar to collapse at a certain device width right here also is the place to include a button component with the classes
.navbar-toggler.hidden- ~ the last sizing you would want the navbar showed inline ~ -uptype="button" data-toggle="collapse"data-target="# ~ the ID of the element storing the actual navbar content ~"Statin things this way the next step in developing the navbar is producing a
<div>.collapse.navbar-toggleable- ~ the largest screen size where you wish it collapsed ~.navbar-toggleable-smYet another thing to mention
A fact to keep in mind is that in the new Bootstrap 4 framework the ways of assigning the positioning of the navbar items has been altered a bit in order different conditions to get possibly assigned to various screen sizes. It gets achieved by the
.pull- ~ screen size ~ -left.pull- ~ screen size ~ -right.nav.pull- ~ screen size ~ -none.navbar-right.navbar-leftYou may potentially choose to put a simple form feature inside your navbar-- typically right after the
.nav.form-inline.navbar-formContinue reading for an illustration and selection of upheld sub-components.
Situations
Provided content
Navbars featured built-in help for a fistful of sub-components. Pick the following like wanted:
.navbar-brand.navbar-nav.navbar-toggler.form-inline.navbar-text.collapse.navbar-collapseHere is simply an illustration of all the sub-components included within a responsive light-themed navbar which quickly collapses at the
md
<nav class="navbar navbar-toggleable-md navbar-light bg-faded">
  <button class="navbar-toggler navbar-toggler-right" type="button" data-toggle="collapse" data-target="#navbarSupportedContent" aria-controls="navbarSupportedContent" aria-expanded="false" aria-label="Toggle navigation">
    <span class="navbar-toggler-icon"></span>
  </button>
  <a class="navbar-brand" href="#">Navbar</a>

  <div class="collapse navbar-collapse" id="navbarSupportedContent">
    <ul class="navbar-nav mr-auto">
      <li class="nav-item active">
        <a class="nav-link" href="#">Home <span class="sr-only">(current)</span></a>
      </li>
      <li class="nav-item">
        <a class="nav-link" href="#">Link</a>
      </li>
      <li class="nav-item">
        <a class="nav-link disabled" href="#">Disabled</a>
      </li>
    </ul>
    <form class="form-inline my-2 my-lg-0">
      <input class="form-control mr-sm-2" type="text" placeholder="Search">
      <button class="btn btn-outline-success my-2 my-sm-0" type="submit">Search</button>
    </form>
  </div>
</nav>
Brand
The
.navbar-brand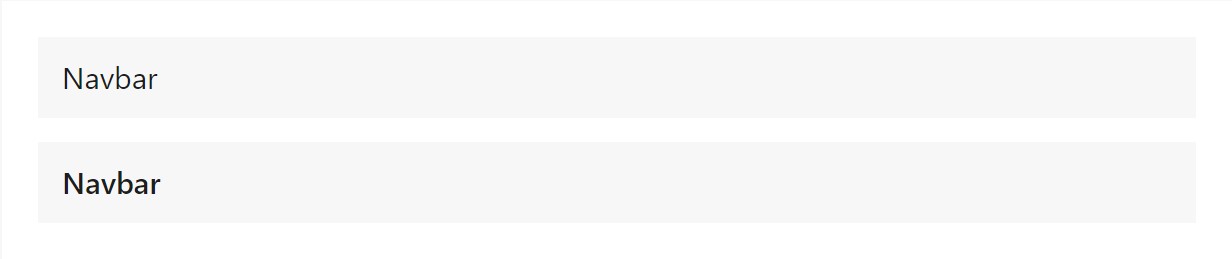
<!-- As a link -->
<nav class="navbar navbar-light bg-faded">
  <a class="navbar-brand" href="#">Navbar</a>
</nav>

<!-- As a heading -->
<nav class="navbar navbar-light bg-faded">
  <h1 class="navbar-brand mb-0">Navbar</h1>
</nav>
Adding illustrations to the
.navbar-brand
<!-- Just an image -->
<nav class="navbar navbar-light bg-faded">
  <a class="navbar-brand" href="#">
    <div class="img"><img src="/assets/brand/bootstrap-solid.svg" width="30" height="30" alt=""></div>
  </a>
</nav>
<!-- Image and text -->
<nav class="navbar navbar-light bg-faded">
  <a class="navbar-brand" href="#">
    <div class="img"><img src="/assets/brand/bootstrap-solid.svg" width="30" height="30" class="d-inline-block align-top" alt=""></div>
    Bootstrap
  </a>
</nav>
Nav
Navbar site navigation web links based on
.navActive conditions-- with
.active.nav-link.nav-item
<nav class="navbar navbar-toggleable-md navbar-light bg-faded">
  <button class="navbar-toggler navbar-toggler-right" type="button" data-toggle="collapse" data-target="#navbarNav" aria-controls="navbarNav" aria-expanded="false" aria-label="Toggle navigation">
    <span class="navbar-toggler-icon"></span>
  </button>
  <a class="navbar-brand" href="#">Navbar</a>
  <div class="collapse navbar-collapse" id="navbarNav">
    <ul class="navbar-nav">
      <li class="nav-item active">
        <a class="nav-link" href="#">Home <span class="sr-only">(current)</span></a>
      </li>
      <li class="nav-item">
        <a class="nav-link" href="#">Features</a>
      </li>
      <li class="nav-item">
        <a class="nav-link" href="#">Pricing</a>
      </li>
      <li class="nav-item">
        <a class="nav-link disabled" href="#">Disabled</a>
      </li>
    </ul>
  </div>
</nav>
And given that we work with classes for our navs, you are able to prevent the list-based approach absolutely if you like.

<nav class="navbar navbar-toggleable-md navbar-light bg-faded">
  <button class="navbar-toggler navbar-toggler-right" type="button" data-toggle="collapse" data-target="#navbarNavAltMarkup" aria-controls="navbarNavAltMarkup" aria-expanded="false" aria-label="Toggle navigation">
    <span class="navbar-toggler-icon"></span>
  </button>
  <a class="navbar-brand" href="#">Navbar</a>
  <div class="collapse navbar-collapse" id="navbarNavAltMarkup">
    <div class="navbar-nav">
      <a class="nav-item nav-link active" href="#">Home <span class="sr-only">(current)</span></a>
      <a class="nav-item nav-link" href="#">Features</a>
      <a class="nav-item nav-link" href="#">Pricing</a>
      <a class="nav-item nav-link disabled" href="#">Disabled</a>
    </div>
  </div>
</nav>
You can also incorporate dropdowns in your navbar nav. Dropdown menus demand a wrapping element for positioning, in this way ensure to employ separate and embedded elements for
.nav-item.nav-link
<nav class="navbar navbar-toggleable-md navbar-light bg-faded">
  <button class="navbar-toggler navbar-toggler-right" type="button" data-toggle="collapse" data-target="#navbarNavDropdown" aria-controls="navbarNavDropdown" aria-expanded="false" aria-label="Toggle navigation">
    <span class="navbar-toggler-icon"></span>
  </button>
  <a class="navbar-brand" href="#">Navbar</a>
  <div class="collapse navbar-collapse" id="navbarNavDropdown">
    <ul class="navbar-nav">
      <li class="nav-item active">
        <a class="nav-link" href="#">Home <span class="sr-only">(current)</span></a>
      </li>
      <li class="nav-item">
        <a class="nav-link" href="#">Features</a>
      </li>
      <li class="nav-item">
        <a class="nav-link" href="#">Pricing</a>
      </li>
      <li class="nav-item dropdown">
        <a class="nav-link dropdown-toggle" href="http://example.com" id="navbarDropdownMenuLink" data-toggle="dropdown" aria-haspopup="true" aria-expanded="false">
          Dropdown link
        </a>
        <div class="dropdown-menu" aria-labelledby="navbarDropdownMenuLink">
          <a class="dropdown-item" href="#">Action</a>
          <a class="dropdown-item" href="#">Another action</a>
          <a class="dropdown-item" href="#">Something else here</a>
        </div>
      </li>
    </ul>
  </div>
</nav>
Forms
Set various form controls and elements in a navbar with
.form-inline
<nav class="navbar navbar-light bg-faded">
  <form class="form-inline">
    <input class="form-control mr-sm-2" type="text" placeholder="Search">
    <button class="btn btn-outline-success my-2 my-sm-0" type="submit">Search</button>
  </form>
</nav>
Straighten the materials of your inline forms with utilities just as wanted.

<nav class="navbar navbar-light bg-faded justify-content-between">
  <a class="navbar-brand">Navbar</a>
  <form class="form-inline">
    <input class="form-control mr-sm-2" type="text" placeholder="Search">
    <button class="btn btn-outline-success my-2 my-sm-0" type="submit">Search</button>
  </form>
</nav>
Input groups operate, as well:

<nav class="navbar navbar-light bg-faded">
  <form class="form-inline">
    <div class="input-group">
      <span class="input-group-addon" id="basic-addon1">@</span>
      <input type="text" class="form-control" placeholder="Username" aria-describedby="basic-addon1">
    </div>
  </form>
</nav>
Several buttons are maintained like part of these navbar forms, too. This is likewise a fantastic pointer that vertical positioning utilities may possibly be utilized to straighten different sized components.

<nav class="navbar navbar-light bg-faded">
  <form class="form-inline">
    <button class="btn btn-outline-success" type="button">Main button</button>
    <button class="btn btn-sm align-middle btn-outline-secondary" type="button">Smaller button</button>
  </form>
</nav>
Message
Navbars may possibly provide little bits of text message by using
.navbar-text
<nav class="navbar navbar-light bg-faded">
  <span class="navbar-text">
    Navbar text with an inline element
  </span>
</nav>
Combine and match with other components and utilities like wanted.

<nav class="navbar navbar-toggleable-md navbar-light bg-faded">
  <button class="navbar-toggler navbar-toggler-right" type="button" data-toggle="collapse" data-target="#navbarText" aria-controls="navbarText" aria-expanded="false" aria-label="Toggle navigation">
    <span class="navbar-toggler-icon"></span>
  </button>
  <a class="navbar-brand" href="#">Navbar w/ text</a>
  <div class="collapse navbar-collapse" id="navbarText">
    <ul class="navbar-nav mr-auto">
      <li class="nav-item active">
        <a class="nav-link" href="#">Home <span class="sr-only">(current)</span></a>
      </li>
      <li class="nav-item">
        <a class="nav-link" href="#">Features</a>
      </li>
      <li class="nav-item">
        <a class="nav-link" href="#">Pricing</a>
      </li>
    </ul>
    <span class="navbar-text">
      Navbar text with an inline element
    </span>
  </div>
</nav>
Color design
Style the navbar has never been certainly simpler due to the mixture of style classes and
background-color.navbar-light.navbar-inverse.bg-*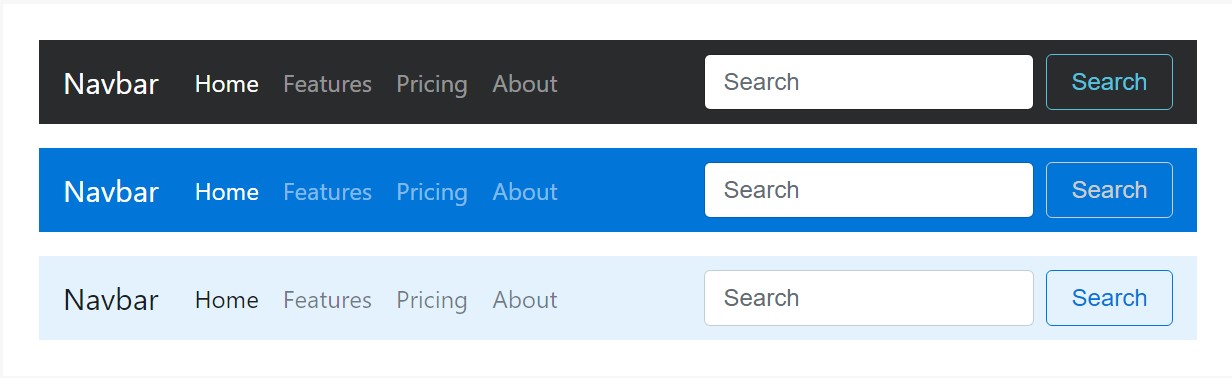
<nav class="navbar navbar-inverse bg-inverse">
  <!-- Navbar content -->
</nav>

<nav class="navbar navbar-inverse bg-primary">
  <!-- Navbar content -->
</nav>

<nav class="navbar navbar-light" style="background-color: #e3f2fd;">
  <!-- Navbar content -->
</nav>
Containers
Although it's not required, you can certainly cover a navbar in a
.container
<div class="container">
  <nav class="navbar navbar-toggleable-md navbar-light bg-faded">
    <a class="navbar-brand" href="#">Navbar</a>
  </nav>
</div>
In the event that the container is inside your navbar, its horizontal padding is taken away at breakpoints beneath your indicated
.navbar-toggleable-*
<nav class="navbar navbar-toggleable-md navbar-light bg-faded">
  <div class="container">
    <a class="navbar-brand" href="#">Navbar</a>
  </div>
</nav>
Positioning
Utilize setting utilities to put navbars inside non-static settings. Pick from set to the top, fixed to the bottom, or else stickied to the top . Keep in mind that
position: sticky.sticky-top
<nav class="navbar navbar-light bg-faded">
  <a class="navbar-brand" href="#">Full width</a>
</nav>
<nav class="navbar fixed-top navbar-light bg-faded">
  <a class="navbar-brand" href="#">Fixed top</a>
</nav>
<nav class="navbar fixed-bottom navbar-light bg-faded">
  <a class="navbar-brand" href="#">Fixed bottom</a>
</nav>
<nav class="navbar sticky-top navbar-light bg-faded">
  <a class="navbar-brand" href="#">Sticky top</a>
</nav>
Responsive activities
Navbars can certainly use
.navbar-toggler.navbar-collapse.navbar-toggleable-*Toggler
Navbar togglers can possibly be left or right fixed with
.navbar-toggler-left.navbar-toggler-rightWith no
.navbar-brand
<nav class="navbar navbar-toggleable-md navbar-light bg-faded">
  <button class="navbar-toggler" type="button" data-toggle="collapse" data-target="#navbarTogglerDemo01" aria-controls="navbarTogglerDemo01" aria-expanded="false" aria-label="Toggle navigation">
    <span class="navbar-toggler-icon"></span>
  </button>
  <div class="collapse navbar-collapse" id="navbarTogglerDemo01">
    <a class="navbar-brand" href="#">Hidden brand</a>
    <ul class="navbar-nav mr-auto mt-2 mt-lg-0">
      <li class="nav-item active">
        <a class="nav-link" href="#">Home <span class="sr-only">(current)</span></a>
      </li>
      <li class="nav-item">
        <a class="nav-link" href="#">Link</a>
      </li>
      <li class="nav-item">
        <a class="nav-link disabled" href="#">Disabled</a>
      </li>
    </ul>
    <form class="form-inline my-2 my-lg-0">
      <input class="form-control mr-sm-2" type="text" placeholder="Search">
      <button class="btn btn-outline-success my-2 my-sm-0" type="submit">Search</button>
    </form>
  </div>
</nav>
Together with a brand name shown on the left and toggler on the right:

<nav class="navbar navbar-toggleable-md navbar-light bg-faded">
  <button class="navbar-toggler navbar-toggler-right" type="button" data-toggle="collapse" data-target="#navbarTogglerDemo02" aria-controls="navbarTogglerDemo02" aria-expanded="false" aria-label="Toggle navigation">
    <span class="navbar-toggler-icon"></span>
  </button>
  <a class="navbar-brand" href="#">Navbar</a>

  <div class="collapse navbar-collapse" id="navbarTogglerDemo02">
    <ul class="navbar-nav mr-auto mt-2 mt-md-0">
      <li class="nav-item active">
        <a class="nav-link" href="#">Home <span class="sr-only">(current)</span></a>
      </li>
      <li class="nav-item">
        <a class="nav-link" href="#">Link</a>
      </li>
      <li class="nav-item">
        <a class="nav-link disabled" href="#">Disabled</a>
      </li>
    </ul>
    <form class="form-inline my-2 my-lg-0">
      <input class="form-control mr-sm-2" type="text" placeholder="Search">
      <button class="btn btn-outline-success my-2 my-sm-0" type="submit">Search</button>
    </form>
  </div>
</nav>
Additional information
Sometimes you wish to operate the collapse plugin in order to cause hidden subject in other places on the web page. For the reason that plugin deals with the
iddata-target
<div class="pos-f-t">
  <div class="collapse" id="navbarToggleExternalContent">
    <div class="bg-inverse p-4">
      <h4 class="text-white">Collapsed content</h4>
      <span class="text-muted">Toggleable via the navbar brand.</span>
    </div>
  </div>
  <nav class="navbar navbar-inverse bg-inverse">
    <button class="navbar-toggler" type="button" data-toggle="collapse" data-target="#navbarToggleExternalContent" aria-controls="navbarToggleExternalContent" aria-expanded="false" aria-label="Toggle navigation">
      <span class="navbar-toggler-icon"></span>
    </button>
  </nav>
</div>
Conclusions
So essentially these are the way a navbar should be constructed in Bootstrap 4 and the fresh neat modifications coming with the newest version. All that's left for you is considering cool page structure and web content.
Take a look at several video clip information about Bootstrap Navbar:
Connected topics:
Bootstrap Navbar authoritative documentation
Regulate navbar item to the right inside Bootstrap 4 alpha 6
Bootstrap Responsive menu in Mobirise