Bootstrap Checkbox Switch
Intro
In some instances the easiest features may possibly become pretty critical-- especially when you get to need them. As an example how do your site visitors connect with the webpages you set up claiming a simple Boolean act-- simply just yes or no relating to a number of the thoughts you should request, how they do consent to the conditions and terms or line up a few of the achievable options they might have. We normally surpass this with no paying enough of an recognition to the feature responsible for these sorts of activities but the Bootstrap Checkbox Style is really a quite significant component-- one our forms can't actually do without.
Inside the most updated fourth version of the Bootstrap framework we are delivered with the
.form-check.form-check-label<div>.form-check.form-check-label<label><input>.form-check-inputThe best ways to work with the Bootstrap checkbox:
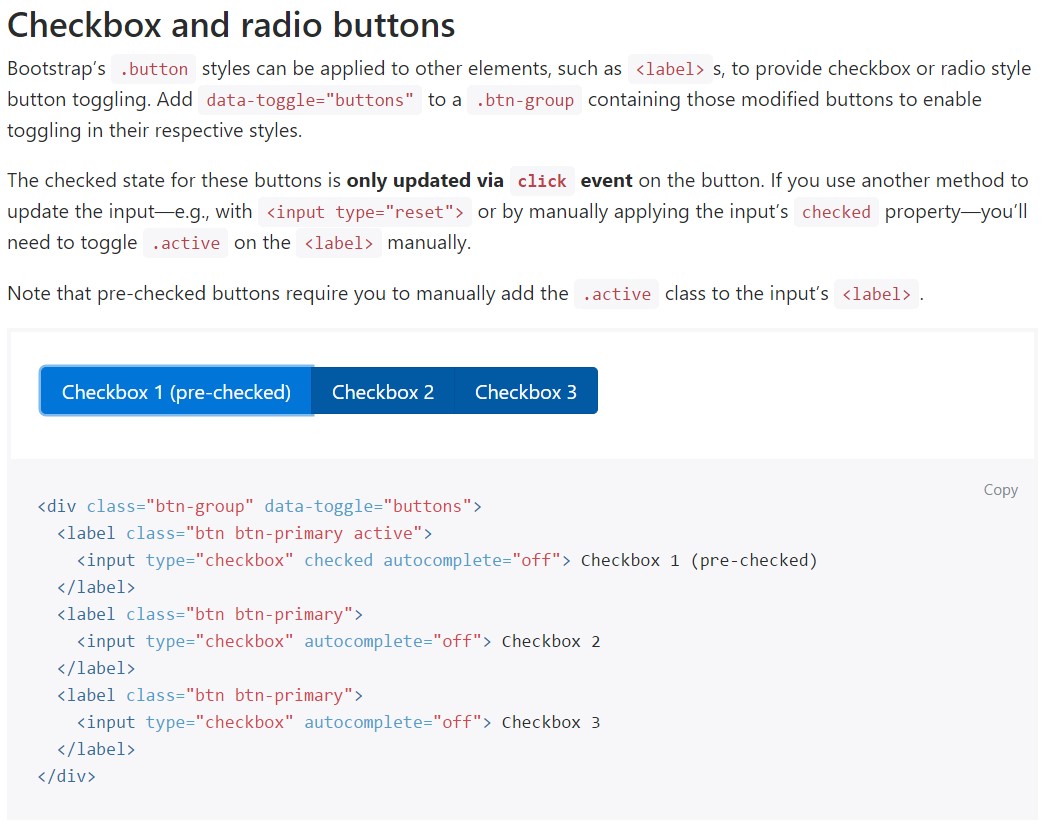
The checked state for these buttons is only updated via click event on the button.

<div class="btn-group" data-toggle="buttons">
  <label class="btn btn-primary active">
    <input type="checkbox" checked autocomplete="off"> Checkbox 1 (pre-checked)
  </label>
  <label class="btn btn-primary">
    <input type="checkbox" autocomplete="off"> Checkbox 2
  </label>
  <label class="btn btn-primary">
    <input type="checkbox" autocomplete="off"> Checkbox 3
  </label>
</div>
In certain cases we want the checkboxes to come inside our forms without the site visitor really having the ability to have some action clicking on them-- that is definitely where the disabled option arrives in.
To disable properly a checkbox in Bootstrap 4 applying the common HTML attribute
disabledIn the case that you find appealing the suggestion and in fact want to handle this you should appoint the
.disabled.form-checkAnother situation
Whenever working with checkboxes, wrap them in a
<label>.custom-control.custom-checkboxWork with
.custom-control-input<input>Also apply two
<span>.custom-control-indicator.custom-control-description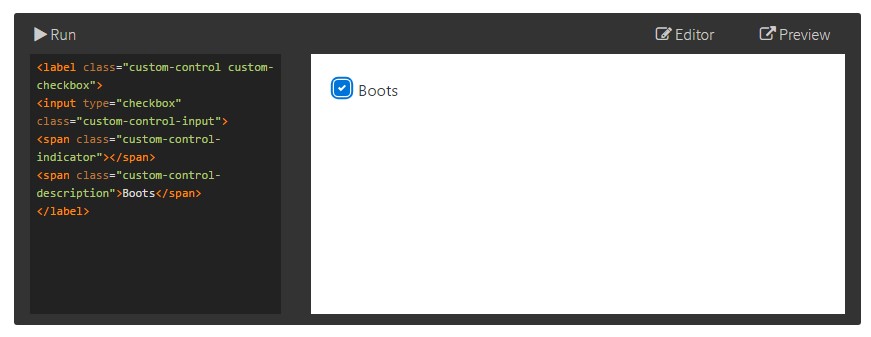
<label class="custom-control custom-checkbox">
<input type="checkbox" class="custom-control-input">
<span class="custom-control-indicator"></span>
<span class="custom-control-description">Boots</span>
</label>
Bootstrap Checkbox Field forms
Default radios and checkboxes are raised upon with the aid of
.form-checkDisabled checkboxes and radios are supported, but to provide a
not-allowed<label>.disabled.form-checkA brand-new aspect for the Bootstrap edition 4 framework is the introduction of the so called customized form features. These are the same components we are knowing within capability but styled even more beautiful and also with the Bootstrap manner. By having them you can surely bring in some spice and personality to your content with simply assigning a few supplemental classes to the commands you feature in your forms.
If you want to use custom checkboxes wrap them in a
<label>.custom-control.custom-checkbox<input>.custom-control-input<span>.custom-control-indicator.custom-control-descriptionFinal thoughts
That's mostly all you require to handle in order to put a checkbox element inside your Bootstrap 4 powered website page and incorporate a number of custom flavor to it adding it a nice looks. Currently all you have to do is repeat the exercise until you've checked every one of the checkboxes wanted are currently on the web page.
Inspect a number of youtube video information relating to Bootstrap checkbox
Linked topics:
Bootstrap checkbox approved information
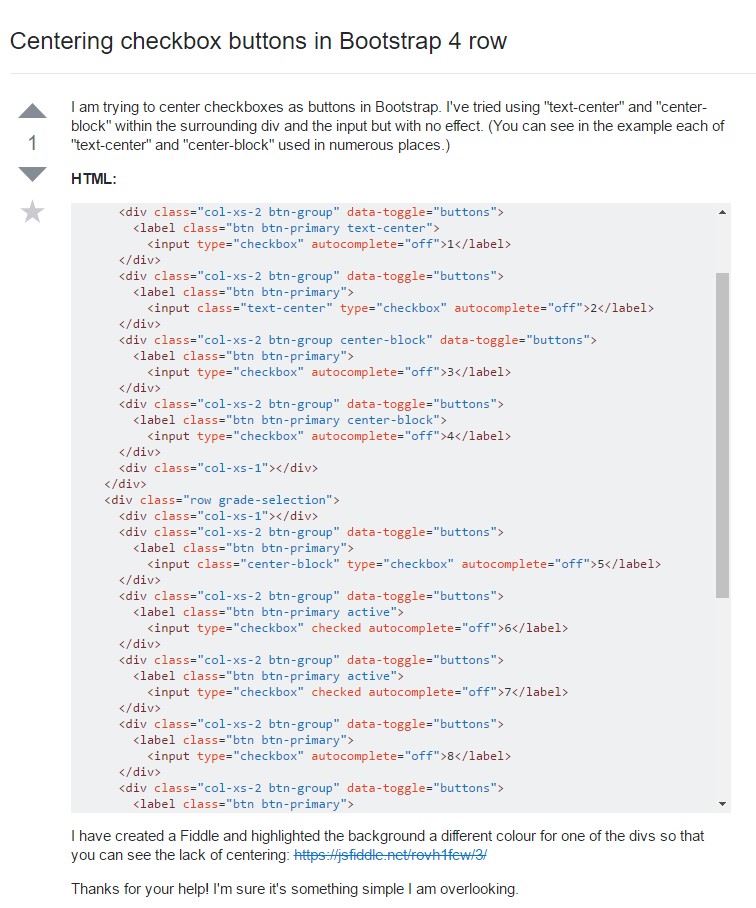
Centering checkbox buttons in Bootstrap 4 row
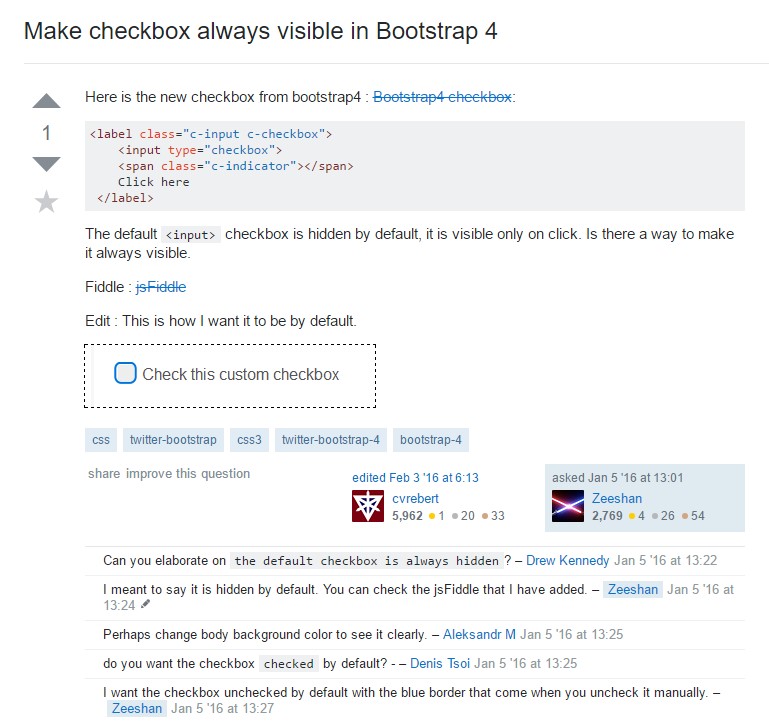
Make checkbox always visible in Bootstrap 4